
Breakfast & Brunch
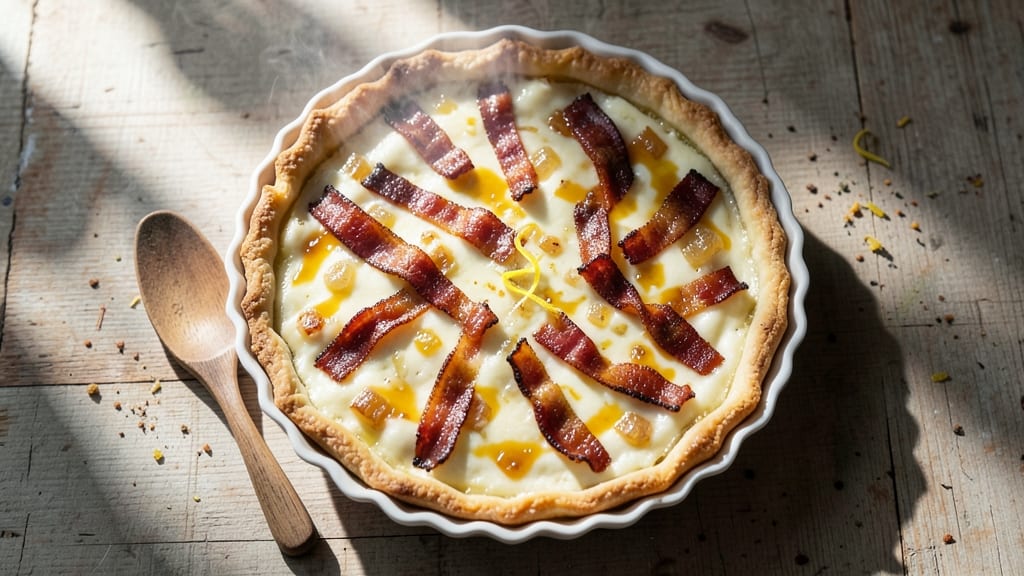
This bacon, cheese, and onion quiche recipe delivers the perfect balance of crispy, golden crust and a rich, creamy filling packed with salty-sweet bites. The secret to success lies in a properly blind-baked crust and a velvety egg custard that holds its shape beautifully.
I've perfected this technique over years of baking, ensuring every slice is fluffy inside and perfectly crisp on the edges.
The filling combines crispy bacon, caramelized onions, and sharp cheddar for a flavor profile that's impossible to resist. While traditional quiches require homemade crusts, this version offers flexibility—whether you choose a classic pie crust or opt for a pre-made shortcut.
The key is achieving that ideal custard consistency, neither too runny nor too dense, so it sets just right while staying tender.
What makes this quiche truly special is how the flavors meld together during baking. The bacon renders its fat into the custard, creating an extra-rich base, while the onions caramelize to add natural sweetness.
Each bite offers a perfect harmony of textures—crisp crust, creamy custard, and tender bacon bits that melt in your mouth.
Ready in about 50 minutes with minimal hands-on time, this quiche is perfect for brunch gatherings or a satisfying weekend breakfast. The recipe scales beautifully, so you can easily adjust the size to feed a crowd or prepare individual portions for meal prep.
Here's how to achieve that restaurant-quality result at home.
Ingredients for bacon cheese and onion quiche
Six ingredients make this quiche's golden crust, plus eight more for the creamy, salty-sweet filling you'll crave.
| Ingredient | Amount | Notes |
|---|---|---|
| Unsalted Butter 🧈 | 1 cup | Cold, cubed for crust |
| All-Purpose Flour 🌾 | 2 ½ cups | Plus 2 tbsp for rolling |
| Ice Cubes ❄️ | ½ cup | For chilling butter |
| Large Eggs 🥚 | 4 whole | Room temperature |
| Heavy Cream 🥛 | 1 cup | Full-fat for richness |
| Whole Milk 🥛 | ½ cup | For creamy custard |
| Sharp Cheddar Cheese 🧀 | 1 ½ cups | Shredded, block preferred |
| Thick-Cut Bacon 🥓 | 8 oz | Crispy, chopped small |
| Yellow Onions 🧅 | 1 ½ cups | Thinly sliced, caramelized |
| Salt 🧂 | 1 tsp | Plus extra for crust |
| Ground Black Pepper 🌶️ | ½ tsp | Freshly cracked |
| Garlic Powder 🧄 | ½ tsp | For depth of flavor |
| Pre-Made Pie Crust 🍰 | 1 package | Or homemade crust |
The bacon and cheddar are non-negotiable here—sharp cheddar (like Cabot) melts beautifully, and thick-cut bacon stays crispy longer. For the onions, yellow onions caramelize best, and I always use 1.5 cups sliced (about 2 medium onions). Costco sells pre-sliced onions in bags, which saves time. The crust? Pre-made is fine (I use Pillsbury for quick weeknights), but homemade gives that restaurant-quality flakiness. If using store-bought, press it into the pan before baking to avoid soggy spots.
No sharp cheddar? Pepper jack adds heat, or Gruyère for nutty depth. Swap thick-cut bacon for turkey bacon if avoiding pork, but it won’t crisp as well. Onions too strong? Soak slices in cold water 10 minutes to mellow the flavor. The custard needs full-fat cream—light cream makes it grainy. For extra richness, add 2 tbsp sour cream to the filling. Diamond Crystal kosher salt is my go-to, but any fine salt works. Freshly cracked pepper makes all the difference—pre-ground tastes flat.
Bacon and onions can be prepped a day ahead—just store separately until mixing. The custard keeps 3 days in the fridge, but the crust stays crispest if baked fresh. For meal prep, slice and freeze portions on a tray before bagging. Reheat covered at 350°F for 15 minutes—the filling stays creamy, not rubbery. Double the crust if feeding a crowd; use a 9x13-inch pan for easy serving.
Why You'll Love This Recipe
- Foolproof Crust: I swear by the ice-cold butter and flour method—no food processor, no stress. That flaky, tender base comes together faster than you can say "bacon bits," and honestly? It’s the secret to a quiche that doesn’t taste like a hostess pie.
- Salty-Sweet Magic: Crispy bacon meets caramelized onions in a creamy egg bath—it’s the kind of combo that makes you close your eyes and sigh. The heavy cream and eggs turn every bite into a rich, satisfying hug, while the cheese ties it all together like a warm blanket.
- Weeknight to Brunch: Make it for a lazy Sunday morning or a weeknight dinner when you’re too tired to think. The leftovers? Still just as good reheated (or cold, no judgment). It’s my go-to when I need something hearty but doesn’t require a grocery haul.
- Budget Breakfast Hack: Eggs, butter, and flour are pantry staples—this quiche stretches dollars without skimping on flavor. Between us, I’ve fed a crowd of six for under $15, and no one ever complains. That’s a win in my book.
Step-by-step instructions for bacon, cheese, and onion quiche
Here's how to create a quiche with a golden crust and rich, savory filling that'll have everyone begging for seconds.
Prepare the Crust for Maximum Flakiness
In a large bowl, combine the 1 cup unsalted butter (cold and cubed) with the 2.5 cups all-purpose flour and 1 teaspoon salt. Use your fingers or a pastry cutter to work the butter into the flour until it resembles coarse crumbs with some pea-sized butter pieces remaining. This texture is crucial for that signature flaky crust.
Add the 0.5 cup ice cubes and gently toss everything together until evenly distributed. The ice will help keep the butter cold during mixing, which prevents the dough from developing gluten and becoming tough. Press the dough into a disk, wrap it in plastic wrap, and refrigerate for at least 1 hour—this resting time is non-negotiable for a crisp crust.
Cook the Bacon and Caramelize the Onions
While the crust chills, cook the 8 ounces thick-cut bacon in a large skillet over medium heat until it's deep golden brown and crispy, about 10-12 minutes. Transfer the bacon to a paper towel-lined plate to drain, leaving the rendered fat in the skillet. Chop the bacon into small pieces—you want bite-sized chunks throughout the quiche.
In the same skillet (with the bacon fat), add the 1.5 cups yellow onions and cook over medium-low heat for 15-20 minutes, stirring occasionally. The onions should soften and develop a deep golden color—this caramelization adds sweetness that balances the salty bacon. Season with ½ teaspoon garlic powder during the last 2 minutes of cooking.
Assemble the Filling with Perfect Texture
In a large bowl, whisk together the 4 whole eggs, 1 cup heavy cream, ½ cup whole milk, 1.5 cups sharp cheddar cheese, ½ teaspoon ground black pepper, and the remaining ½ teaspoon salt. The mixture should be smooth and slightly thick—this will create that signature creamy custard once baked.
Gently fold in the cooked bacon and caramelized onions, along with any accumulated juices from the skillet. The filling should be evenly distributed with no dry spots. Pour this mixture into the chilled pie crust, spreading it out evenly. The filling should come up to about ½ inch from the crust's edge—this ensures a proper rise during baking.
Bake to Golden Perfection
Preheat your oven to 375°F. Place the unbaked quiche on a baking sheet lined with parchment paper to catch any potential spills. Bake for 40-45 minutes until the crust is deep golden brown and the filling is set but still slightly jiggly in the center (it'll continue cooking as it cools).
Here's the thing—don't overbake. You want the center to be just set, not rubbery. If the edges brown too quickly, cover them loosely with aluminum foil after 20 minutes to prevent burning while the center finishes cooking. The quiche is perfect when it reaches 165°F internally and pulls away slightly from the crust's edges.
Rest and Serve for Maximum Enjoyment
Remove the quiche from the oven and let it rest for 10-15 minutes before slicing. This resting period allows the custard to fully set and redistribute its juices, preventing a runny center. The contrast between the crisp, flaky crust and the creamy, savory filling is what makes this quiche extraordinary.
Slice into 6 equal wedges and serve warm. The combination of crispy bacon, caramelized onions, and sharp cheddar creates a symphony of flavors in every bite. Pair it with a simple green salad and crusty bread for a complete meal that'll impress even the most discerning quiche lovers.
Pro Tips For Making Bacon Cheese And Onion Quiche
- Chill the Dough Properly: I learned this the hard way—skipping the ice cubes in the flour mix leads to a tough crust. Pulse the flour, butter, and ice together in the food processor until the mixture resembles coarse crumbs, not pea-sized bits. The ice keeps the butter from melting too soon, so the crust stays flaky instead of greasy.
- Pre-Cook the Bacon: Crisp the bacon until it’s just past golden—about 80% done—then drain it on paper towels. This prevents the quiche from getting soggy later, and the bacon stays crispy instead of turning rubbery. (Yes, even if you’re impatient like me, resist the urge to fully cook it in the pan.)
- Blind-Bake the Crust: Roll out the dough, press it into the pie dish, then prick the bottom all over with a fork. Cover it with parchment paper, fill with pie weights or dried beans, and bake at 375°F (190°C) for 10 minutes before adding the filling. This ensures the crust holds its shape and doesn’t puff up like a sad soufflé when the custard goes in.
- Whisk the Eggs Cold: Beat the eggs and heavy cream together cold—straight from the fridge—and add the cheese last. Warm eggs create a curdled mess, and cold custard sets more evenly. If you’re in a rush, just pop the bowl in the freezer for 5 minutes while you prep the filling. (Your future self will thank you.)
Make-ahead tips for bacon cheese and onion quiche
Prep Ahead Strategy
Assemble the filling components up to 24 hours before baking. Cook the bacon and caramelize the onions, then store them separately in airtight containers in the fridge. When ready to bake, simply whisk the custard, fold in the cooled bacon and onions, and pour into your crust.
This shortcut saves 30 minutes of active prep time on busy mornings. 🧂
Crust Pre-Baking
For the crispiest crust, blind-bake your pie shell a day ahead. Line the crust with parchment paper, fill with pie weights or dried beans, and bake at 375°F for 15 minutes. Remove the weights and bake 5 more minutes until golden.
Cool completely, then store in an airtight container at room temperature. Reheat in the oven for 3-5 minutes at 350°F before adding filling to prevent sogginess. ⏰
Filling Assembly
Mix the custard ingredients the night before and refrigerate in a sealed container. The eggs and dairy will thicken slightly but remain usable. When ready to bake, whisk briefly to recombine, then proceed with assembly.
For extra richness, stir in 2 tablespoons sour cream with the custard—it adds a velvety texture that holds up beautifully when reheated. 🥛
Portion Control
Bake the quiche in a 9x13-inch pan for easy slicing and serving. After baking, let it cool completely, then wrap tightly in plastic wrap or aluminum foil. Store in the fridge for up to 4 days.
To serve, slice into 6 equal rectangles (about 2x3 inches each) and reheat covered at 325°F for 15 minutes—this keeps the crust crisp while warming the filling gently. 🍽️
Freezer-Friendly
This quiche freezes exceptionally well for up to 3 months. After baking, cool completely, then wrap each slice individually in plastic wrap before placing in a freezer bag. To reheat, bake from frozen at 350°F for 20-25 minutes until the crust is crisp and the filling reaches 165°F.
The texture remains creamy, not rubbery, thanks to the high-fat custard. Label bags with the date to track freshness. ❄️
Make-Ahead Brunch
For brunch gatherings, prepare the entire quiche the night before and keep it refrigerated. Reheat at 325°F for 20 minutes before serving—this gentle temperature prevents the crust from becoming tough. Garnish with fresh chives or parsley just before serving to add a pop of color.
Serve with a side of roasted potatoes or a simple arugula salad for a complete meal that requires zero morning stress. ✨
Nutrition facts
Frequently asked questions
Can I use a pre-made crust for this quiche?
A pre-made crust saves time while still delivering great results. Use a high-quality refrigerated pie crust and press it firmly into your pan before adding the filling. For extra crispiness, blind-bake the crust for 10 minutes at 375°F before adding the filling. Just avoid overfilling—keep it ½ inch below the crust edge to prevent spillage.
Why did my quiche custard turn out too runny?
Runny custard usually means the eggs and dairy weren't properly combined or the quiche didn't bake long enough. First, whisk the custard ingredients until smooth—no lumps! Then bake until the center reaches 165°F and jiggles slightly (it'll set as it cools). For extra insurance, add 1 tablespoon cornstarch to the custard mixture before baking.
How can I make this quiche ahead for brunch?
This quiche is perfect for meal prep! Assemble the filling (without the crust) up to 24 hours ahead and refrigerate. When ready to bake, pour into your crust and bake as directed. For a complete make-ahead solution, bake the quiche 1 day ahead, then reheat at 325°F for 20 minutes before serving. The flavors actually improve overnight!
Can I substitute turkey bacon or vegan cheese?
Turkey bacon works but won't crisp as well—cook it 2 extra minutes for better texture. For vegan cheese, use a high-melt variety like Miyoko's and reduce the oil in the crust by 1 tablespoon (vegan cheese is less fatty). The quiche will still be delicious, though the flavor profile will differ slightly. For vegan bacon, try coconut bacon or smoked tofu strips.
What's the best way to reheat leftovers?
For perfect reheating, cover slices with aluminum foil and warm at 325°F for 15 minutes. This gentle heat keeps the crust crisp while gently warming the filling. Avoid microwaving—it makes the crust soggy. For frozen slices, bake from frozen at 350°F for 20-25 minutes until the crust is golden and filling reaches 165°F.