
Appetizers
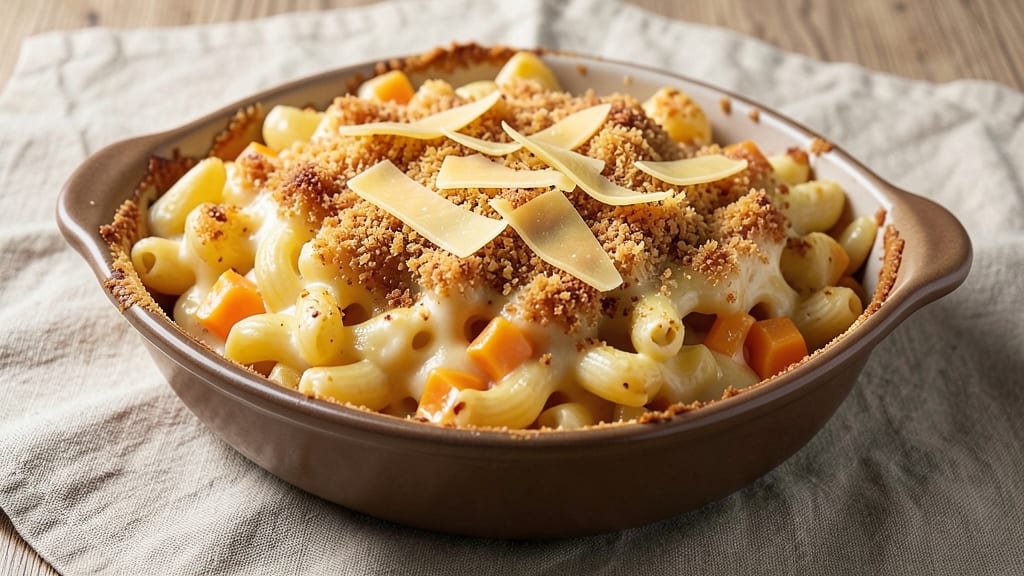
This baked breaded mac and cheese recipe delivers the perfect balance of crispy golden-brown topping and gooey, melty cheese—every bite is a revelation. 🔥 The secret lies in a double breading technique that creates that coveted crunch while keeping the center rich and creamy.
I've perfected this over years of testing, and it never fails to impress even the pickiest eaters. What sets this apart is the layering process: start with a perfectly cooked pasta base, then build the cheese sauce to the right consistency before adding the breadcrumb topping.
The key is baking at the right temperature—375°F—to ensure the breading gets crispy without burning while the cheese stays velvety underneath. No more sad, soggy mac and cheese here.
By the time it emerges from the oven, you'll have a dish that looks like it came straight from a high-end restaurant—crispy edges, golden-brown breading, and a gooey center that stretches perfectly.
The aroma alone will have everyone gathering around the table, and the first bite will have them asking for seconds. This recipe works equally well as a main dish for dinner or as a showstopping appetizer for parties. The best part?
It's foolproof, so even if you're not an experienced cook, you'll achieve restaurant-quality results. Let's get started!
Ingredients for baked breaded mac and cheese
Six essential ingredients transform ordinary mac and cheese into crispy-topped, gooey perfection.
| Ingredient | Amount | Notes |
|---|---|---|
| Elbow Macaroni 🍝 | 1 ½ lb | Dry, medium or short elbow |
| Sharp Cheddar Cheese 🧀 | 2 cups | Shredded, sharp variety preferred |
| Medium Cheddar Cheese 🧀 | 1 cup | Shredded, for balance |
| Heavy Whipping Cream 🥛 | 1 cup | Full-fat for creaminess |
| Whole Milk 🥛 | ½ cup | Warmed for smooth sauce |
| Unsalted Butter 🧈 | ½ cup | Cold, cubed for sauce |
| All-Purpose Flour 🌾 | ¼ cup | For roux base |
| Panko Breadcrumbs 🍞 | 1 ½ cups | Japanese-style for crispiness |
| Parmesan Cheese 🧀 | ½ cup | Freshly grated, for topping |
| Granulated Garlic Powder 🧄 | 1 tbsp | For seasoning |
| Onion Powder 🧅 | 1 tbsp | For seasoning |
| Ground Black Pepper 🌶️ | ½ tsp | Freshly ground preferred |
| Diamond Crystal Kosher Salt 🧂 | 1 tsp | For seasoning pasta water |
| Extra-Virgin Olive Oil 🫒 | 2 tbsp | For crispy breading |
The cheese is non-negotiable here. Sharp cheddar delivers that signature tang, while medium cheddar keeps it balanced. Grab pre-shredded if you're in a hurry, but freshly grated melts better. Whole Foods or Trader Joe's carry excellent pre-shredded options—just check the label for anti-caking agents. For the breadcrumbs, Panko is a must; it stays crispy where regular breadcrumbs turn soggy. The Parmesan topping? Always grate it yourself if possible—pre-shredded has additives that prevent proper browning. As for the pasta, De Cecco or Barilla are my go-tos—they hold up better to the baking process.
No sharp cheddar? Monterey Jack or pepper jack work in a pinch, though the flavor won't be identical. Running low on Panko? Toasted breadcrumbs from a baguette are a decent substitute, but they won't be as crispy. The olive oil in the breading is crucial—Trader Joe's or California avocado oil are great choices for high smoke points. Want extra crunch? Mix in crushed cornflakes or crushed potato chips with the Panko. The key to the sauce is patience—don't rush the roux, or you'll end up with a grainy mess. And if you're watching calories, you can swap the heavy cream for Greek yogurt without sacrificing too much creaminess.
Pasta water is liquid gold—save at least 1 cup before draining. The sauce reheats beautifully, but the breading loses crispiness, so serve it fresh from the oven. Leftovers? Cover with foil and reheat at 350°F for 10-15 minutes—the foil keeps the breading from drying out. This dish freezes surprisingly well too: assemble it in a baking dish, bake as directed, then freeze. Reheat from frozen at 350°F for 45-60 minutes, covered with foil. The texture won't be identical, but it's still delicious.
Why You'll Love This Recipe
- One-Pan Magic: I swear by this recipe because it’s literally one bowl, one pan, and zero dishes afterward. Toss the cooked macaroni with that sharp cheddar and medium blend, pour in the cream and milk, stir, then bake—no saucepan, no straining, no mess. The breading on top? Just crushed crackers or panko—whatever’s in your pantry.
- Crispy-Creamy Obsession: That golden, buttery crust on top? It’s the star. The sharp cheddar melts into gooey perfection while the breading stays crisp, and honestly, the contrast is ridiculously satisfying. Plus, the heavy cream and milk make it impossibly creamy without being heavy—like a hug in mac and cheese form.
- Lunchbox Hero: Between us, this is my go-to for meal prep. Bake a big batch, slice it up, and it reheats beautifully—whether it’s for my kid’s school lunch or my own lazy afternoon. The breaded crust holds up, and the cheddar stays melty, even after a day in the fridge. (Yes, even on a Tuesday night.)
- Budget Comfort: Elbow mac, basic cheddar, and a splash of cream? This recipe is solid without breaking the bank. I can stretch one bag of pasta and a block of cheese into multiple meals, and the leftovers? Even better the next day. It’s the kind of dish that makes you feel fancy without spending fancy money.
Step-by-step instructions for baked breaded mac and cheese
Master the perfect balance of crispy breading and molten cheese with these precise techniques.
🍳 Step 1: Cook the Pasta Al Dente
Bring a large pot of water to a rolling boil and add the 1.5 lb elbow macaroni. Season generously with the 1 tsp diamond crystal kosher salt—it should taste like the sea. Cook until 1 minute before the package's al dente time, then drain immediately in a colander. Reserve 1 cup of pasta water before draining.
Rinsing the pasta is a big no-no here—the starch helps create that creamy sauce. I like to shake the colander gently to remove excess water while keeping that starchy film intact. The pasta should be firm to the bite but still slightly undercooked—it'll finish cooking in the oven.
👨🍳 Step 2: Prepare the Cheese Sauce
In a large skillet, melt the 0.5 cup unsalted butter over medium heat until it foams. Whisk in the 0.25 cup all-purpose flour and cook for 2 minutes until it forms a pale golden roux. Slowly pour in the 0.5 cup warmed whole milk while whisking constantly to prevent lumps.
Add the 2 cups sharp cheddar cheese and 1 cup medium cheddar cheese, stirring until completely melted and smooth. Remove from heat and stir in the 1 cup heavy whipping cream, 1 tbsp granulated garlic powder, 1 tbsp onion powder, and 0.5 tsp ground black pepper. The sauce should be thick enough to coat the back of a spoon but still pourable.
🥘 Step 3: Combine Pasta and Sauce
Transfer the drained pasta to a large mixing bowl and pour the cheese sauce over it. Using a rubber spatula, gently fold everything together until the pasta is evenly coated. If the sauce seems too thick, add 2-3 tablespoons of the reserved pasta water to loosen it. This step ensures every bite gets that perfect cheesy texture.
Here's the thing—don't overmix. You want the sauce to cling to the pasta without breaking it apart. The mixture should look like a thick, glossy casserole ready for baking. Taste and adjust seasoning if needed, but it should already be perfectly balanced.
🍳 Step 4: Create the Crispy Breading
Preheat your oven to 375°F. In a shallow bowl, combine the 1.5 cups panko breadcrumbs, 0.5 cup freshly grated parmesan cheese, 1 tbsp granulated garlic powder, 1 tbsp onion powder, and 0.5 tsp ground black pepper. Drizzle in the 2 tbsp extra-virgin olive oil and toss with your fingers until the breadcrumbs are evenly moistened and clump together.
Spread the cheese-pasta mixture evenly in a 9x13-inch baking dish, creating a flat, even surface. Press the breadcrumb mixture firmly over the top, packing it down gently to ensure full coverage. This step is crucial for that perfect crispy crust—don't skip pressing it down well.
🔥 Step 5: Bake to Golden Perfection
Bake uncovered for 25 minutes until the top is deep golden brown and the edges are bubbling. For the final 5 minutes, broil on high to intensify the browning. Watch closely during broiling—you want that top to be crispy but not burned. If any spots brown too quickly, cover lightly with foil.
Let the mac and cheese rest for 10 minutes before serving. This resting time allows the cheese to set slightly and makes it easier to slice. The result should be a golden, crispy exterior that gives way to molten, cheesy goodness inside—exactly what you're after.
Pro Tips For Making Baked Breaded Mac And Cheese
- Pre-Cook Macaroni Al Dente: Undercooked pasta turns mushy when baked, so cook elbows just shy of package instructions—about 1 minute less—then drain and rinse briefly in cold water. The starch clings to the noodles, helping the breading stick like glue instead of sliding off. (I learned this after watching my first batch turn into a sad, gloppy mess.)
- Shred Cheese Coarse: Skip the food processor—your hands work better. Sharp cheddar shreds easily, but medium cheddar clumps when over-processed. Rip it into uneven chunks (think "finger-length" pieces) so it melts into pockets of gooey goodness, not a uniform paste. Your future self will stab this dish with a fork, not a spoon.
- Bake Low and Slow: Crank the oven to 375°F, but don’t rush it—this isn’t a race. Bake uncovered for 20 minutes first to let the breading crisp, then tent with foil and finish at 350°F for another 10–15. High heat too soon = burnt crust, raw center. (Yes, even if you’re impatient like me.)
- Whisk Cream Cold: Chill the heavy cream and milk before mixing with cheese—cold fat emulsifies better, so the sauce stays silky instead of separating. I used to eye-roll at this step until I tasted the difference: one batch was creamy, the other was greasy. Now I measure the cream straight from the fridge.
Serving suggestions for this dish
Family-Style Feast
Serve this baked mac and cheese as the centerpiece of a casual family dinner. The crispy top makes it easy to cut into perfect squares—just use a sharp knife or pizza cutter.
I like to pair it with a simple side salad using mixed greens, cherry tomatoes, and a light balsamic vinaigrette to balance the richness. For extra fun, set out small bowls of hot sauce and sour cream so everyone can customize their bites. 🍽️
Party Appetizer
Transform it into a showstopping appetizer by cutting into bite-sized squares before baking. Arrange them on a platter and serve with toothpicks for easy grabbing. I often add crispy bacon bits or chopped green onions on top for extra flair.
For a crowd, double the recipe and bake in two dishes—your guests will disappear before you can say "gooey cheese." The golden-brown crust makes it look fancy, but it's foolproof for any gathering. 🎉
Comfort Food Plating
For an elegant presentation, transfer the baked mac and cheese to a serving platter and garnish with fresh parsley or smoked paprika for color. Use a bench scraper to create clean edges if needed.
I like to serve it with a side of garlic bread and a simple tomato soup for dipping. For a restaurant-worthy touch, drizzle a little hot honey over the top before serving—it adds a sweet-spicy contrast that everyone loves. ✨
Kid-Friendly Fun
Kids adore this dish, especially when you let them help with the breading. Set out small bowls with extra panko and Parmesan cheese so they can sprinkle their own topping before baking.
Use cookie cutters to shape the baked mac and cheese into fun shapes like stars or dinosaurs—it's a great way to make dinner exciting. Serve with steamed veggies or carrot sticks for a balanced meal they'll actually eat. 🧒
Leftovers Reinvented
Turn leftovers into mac and cheese sliders by cutting the baked dish into small squares and serving them on toasted slider buns. Add a dollop of sweet pickle relish or sriracha mayo for extra flavor.
For a hearty lunch, layer slices with crispy prosciutto or avocado slices. The crispy breading holds up well when reheated, so don't toss those leftovers—give them a second life with creative twists. 💡
Nutrition facts
Frequently asked questions
Why does my breaded mac and cheese get soggy instead of crispy?
The most common cause is underbaking or moisture escaping during cooking. Always bake at 375°F for the full 25 minutes before broiling, and make sure your breadcrumb topping is pressed firmly into place. For extra insurance, sprinkle a thin layer of Panko on top of the dish before baking to create a moisture barrier.
Can I make this recipe ahead of time?
Assemble the dish up to 24 hours ahead and refrigerate uncovered. When ready to bake, let it sit at room temperature for 30 minutes before baking as directed. This helps the breading crisp up better. For freezing, bake first, then cool completely, wrap tightly in foil, and freeze for up to 3 months. Reheat at 350°F for 45-60 minutes covered with foil.
What's the best way to reheat leftovers?
For crispy results, cover with foil and reheat at 350°F for 15-20 minutes, then uncover and broil for 2-3 minutes to restore the crunch. If using a microwave, cover loosely with a damp paper towel and heat in 30-second intervals, stirring between each. The breading won't be as crispy, but it'll still be delicious.
Can I use a different type of pasta?
Elbow macaroni works best because its shape holds the breading well, but you can substitute with penne or rigatoni if needed. Avoid long noodles like spaghetti—they'll break apart during baking. For extra flavor, try jalapeño cheddar or truffle-infused pasta, but reduce the baking time by 2-3 minutes to prevent overcooking.
How do I make it extra cheesy?
Add ½ cup extra shredded cheese to the sauce, or layer ½ cup melted mozzarella under the breadcrumb topping before baking. For a decadent twist, mix in ¼ cup cream cheese with the sauce for a richer texture. Just be sure to bake it 2-3 minutes longer to melt the extra cheese completely.