
Appetizers
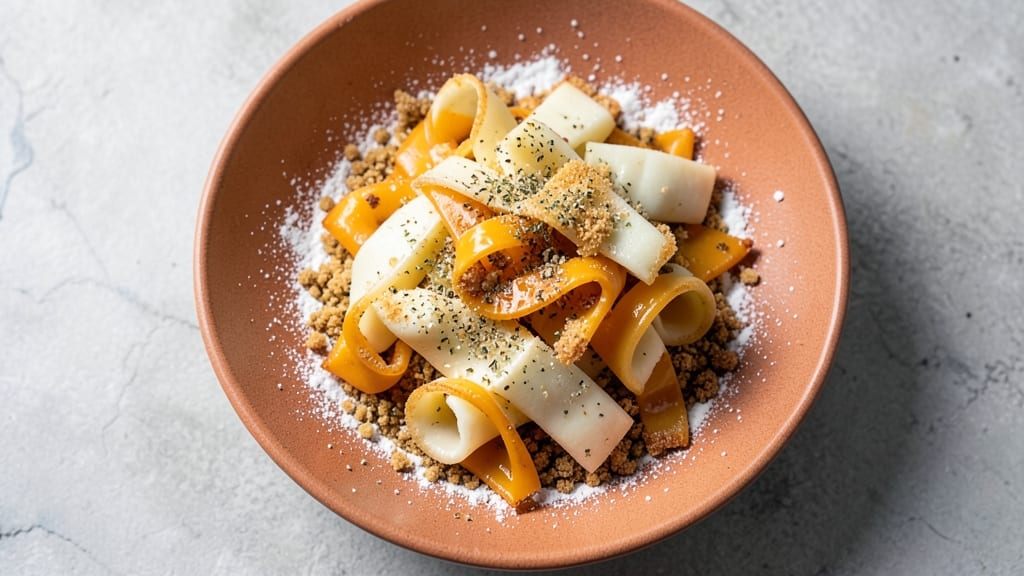
This baked cheese slices recipe delivers the perfect balance of crispy breaded exteriors and gooey, melty centers—ideal for game day or snacking. The secret lies in a light breadcrumb coating that browns beautifully in the oven while protecting the cheese from overcooking.
I’ve perfected this technique over years of testing, ensuring every bite stays tender inside with that satisfying crunch.
The process is straightforward: mix your cheese of choice with a pinch of seasoning, coat in breadcrumbs, and bake until golden.
Whether you prefer classic mozzarella, sharp cheddar, or a blend, the result is consistently crispy on the outside with a molten center that pulls just enough to make it irresistible. No frying required—just oven heat and patience.
What sets this recipe apart is the ability to customize flavors and textures. Add garlic powder, herbs, or even a sprinkle of smoked paprika to the breadcrumbs for extra depth.
Serve warm with marinara, ranch, or honey mustard for dipping—each bite becomes a satisfying crunch followed by that perfect melty pull.
Perfect for parties, game days, or a quick appetizer, these cheese slices are easy to make in batches and reheat beautifully. The key is monitoring the oven closely to avoid over-browning while keeping the cheese creamy. Trust me, once you try this method, store-bought versions won’t compare.
Ingredients for baked cheese slices
Crispy breaded exteriors and gooey melty centers start with these quality ingredients—game day magic in every bite.
| Ingredient | Amount | Notes |
|---|---|---|
| Mozzarella Cheese 🧀 | 12 oz | Fresh mozzarella, sliced into 1/4-inch pieces |
| Sharp Cheddar Cheese 🧀 | 4 oz | Shredded, for added depth |
| Panko Breadcrumbs 🍞 | 1 ½ cups | Light and crispy for perfect texture |
| All-Purpose Flour 🌾 | ½ cup | For extra crunch in coating |
| Granulated Garlic Powder 🧄 | 1 tbsp | Enhances flavor without overpowering |
| Dried Italian Seasoning 🌿 | 1 tsp | Classic blend for authentic taste |
| Ground Black Pepper 🌶️ | ½ tsp | Freshly ground for best flavor |
| Diamond Crystal Kosher Salt 🧂 | ½ tsp | Fine grain for even seasoning |
| Extra-Virgin Olive Oil 🫒 | 1 tbsp | For light brushing before baking |
| Large Eggs 🥚 | 1 whole | Beaten for crispy coating adhesion |
| Unsalted Butter 🧈 | 1 tbsp | Melted for extra richness |
The cheese is where it all begins. Fresh mozzarella is non-negotiable—it melts beautifully without turning rubbery. I always grab the whole-milk variety from the deli counter at Whole Foods or Trader Joe's because it has that perfect balance of creaminess and structure. For extra depth, I blend it with sharp cheddar—the tang cuts through the richness. Pro tip: slice the mozzarella paper-thin with a sharp knife (about 1/4-inch) so it melts evenly. The cheddar? Shred it yourself if you can—pre-shredded gets clumpy. If you're short on time, Kraft 2% milk sharp cheddar works in a pinch, but fresh is always better.
No panko? Italian breadcrumbs from the bulk section will do, but panko gives that perfect airy crunch. The flour is there to help the coating stick—don’t skip it. For the seasoning blend, I like to toast the garlic powder and Italian seasoning in a dry pan for 30 seconds to wake up the flavors (trust me, it makes a difference). Short on eggs? A flax egg (1 tbsp ground flaxseed + 3 tbsp water) works just as well for binding. And if you’ve got smoked paprika lying around, toss in a pinch—it adds this amazing depth that pairs perfectly with the cheesy goodness. The olive oil and melted butter might seem like small amounts, but they’re what make the coating crisp up just right without burning.
These slices reheat like a dream—just pop them in a 350°F oven for 5-7 minutes until golden and bubbly. Store them in an airtight container between layers of parchment paper to keep them crispy for up to 3 days. For longer storage, freeze them on a baking sheet first (so they don’t stick), then transfer to a bag. They’ll keep for 2 months frozen and reheat beautifully. Pro move: make a double batch—they disappear fast at parties, and leftovers reheat even better the second time around.
Why You'll Love This Recipe
- No-Fuss Assembly: I swear by this recipe when I’m too tired to slice and bread cheese myself. Just layer the mozzarella and cheddar, toss the panko with flour and garlic powder, sprinkle on top, and bake—done. The cheddar’s sharp bite cuts through the gooey mozzarella, and that garlic-panko crust? It’s the kind of crunch that makes you forget how little effort went in.
- Crispy-Creamy Magic: Between us, the texture here is chef’s kiss—that golden, shattery crust from the panko and flour, giving way to melty, stretchy cheese inside. The sharp cheddar adds depth, so it’s not just sweet, gooey cheese; it’s got layers. Honestly, I’ve made this for game day snacks, charcuterie boards, and even as a lazy appetizer, and it never disappoints.
- Snack Attack Ready: These slices are my go-to for parties, tailgates, or when I need to feed a crowd without stress. They hold up well at room temp, so I can bake a big batch ahead and serve them straight from the fridge. (Yes, even on a Tuesday night.) Kids grab them by the handful, and adults actually slow down to enjoy them—win-win.
- Budget Stretch: Sharp cheddar and mozzarella are pantry staples, and panko lasts forever. I can make these for under $10 and feed four people, with leftovers that reheat in seconds. Plus, no fancy ingredients—just flour, garlic powder, and a little love. It’s the kind of recipe that makes me feel like I’m feeding people well without breaking the bank.
Step-by-step instructions for crispy breaded cheese slices
Here's how to create golden, crunchy cheese bites with perfectly melty centers every time.
Prepare the Cheese Mixture
In a medium bowl, combine the 12 oz mozzarella cheese (sliced into ¼-inch pieces) and 4 oz shredded sharp cheddar cheese. The mozzarella provides that classic meltiness while the cheddar adds sharp, tangy depth. Use your hands to gently mix the cheeses together, breaking up any large mozzarella slices into smaller chunks about the size of a dime. This ensures even cooking and melting throughout each bite.
I like to work quickly here—once you start assembling the mixture, you want to keep everything cold until baking. If the cheeses begin to soften too much, place the bowl in the refrigerator for 5 minutes while you prepare the next components. The texture should remain firm enough to hold its shape when shaped into slices, but still pliable for easy handling.
Create the Crispy Coating
In a shallow bowl, whisk together the 0.5 cup all-purpose flour, 1 tbsp granulated garlic powder, 1 tsp dried Italian seasoning, 0.5 tsp ground black pepper, and 0.5 tsp Diamond Crystal kosher salt. This blend forms the foundation of your crispy exterior. In another shallow bowl, place the 1.5 cups panko breadcrumbs—they'll provide that satisfying crunch we're after.
For the egg wash, crack the 1 whole large egg into a separate bowl and whisk it lightly with a fork until just combined. The egg acts as a glue, helping the breadcrumbs adhere to the cheese. I always use room-temperature eggs for better adhesion—they coat more evenly than cold ones. Melt the 1 tbsp unsalted butter in the microwave for 10 seconds and set aside for later use.
Assemble and Shape the Cheese Slices
Working with one piece of cheese at a time, roll it between your palms to form a ½-inch thick oval slice. The goal is consistency—aim for uniform size so they all cook at the same rate. Place each shaped slice on a parchment-lined baking sheet, leaving 1 inch of space between them. This prevents them from sticking together during baking.
Here's where the magic happens: dip each cheese slice into the beaten egg, letting any excess drip off, then roll it in the flour mixture to coat evenly. Next, transfer it to the panko breadcrumbs, pressing gently to ensure full coverage. The coating should be even and crispy-looking—this guarantees that perfect crunch when baked. Repeat until all cheese pieces are coated.
Bake to Golden Perfection
Preheat your oven to 375°F and line a second baking sheet with parchment paper. Arrange the coated cheese slices on the prepared sheets, spacing them 1 inch apart for even browning. Brush the tops lightly with the 1 tbsp extra-virgin olive oil using a pastry brush—this promotes browning and adds richness.
Bake for 12-15 minutes, rotating the pans halfway through, until the cheese slices are deep golden brown and the edges are crispy. The internal temperature should reach 165°F when checked with an instant-read thermometer. Watch closely in the last few minutes—overcooking can make them dry. They'll continue to firm up as they cool, so remove them when they're just barely golden.
Finish with Melted Butter
Immediately after removing from the oven, drizzle each cheese slice with a few drops of the melted butter. This step elevates the flavor and adds that restaurant-quality sheen. Let them rest on the baking sheet for 2 minutes to set slightly before transferring to a wire rack to cool completely.
The result should be crispy on the outside with a gooey, melty center that pulls slightly when you tug. Serve warm as appetizers with marinara sauce or a cool beer—each bite delivers that perfect balance of texture and flavor. These cheese bites keep well in an airtight container for 2 days, though they're best enjoyed fresh from the oven!
Pro Tips For Making Baked Cheese Slices
- Preheat Like It’s Hot: Your oven should hit 425°F (220°C) and bake for 10-12 minutes—any lower, and the cheese will sweat instead of crisp. I learned this the hard way after pulling out sad, greasy slices that looked more like fondue than a snack. Trust me, the extra 5 minutes waiting for the oven to roar makes all the difference.
- Dry That Cheese First: Pat the mozzarella and cheddar slices thoroughly with paper towels before dredging in flour. Wet cheese = soggy breading, and nobody wants a mushy bite. Even if it feels like overkill, this is the thing that keeps your slices from turning into a sad, gloppy mess.
- Double-Coat for Crunch: Dip each slice in flour, shake off excess, then press into panko mixed with garlic powder—repeat the process. The first coat sticks, but the second guarantees that golden, shatterable crust. (Yes, it’s twice the work, but your guests won’t notice the effort.)
- Watch the 10-Minute Mark: Pull them out exactly at 10 minutes—not a second later. Overbaking turns cheddar rubbery and mozzarella greasy. If they’re not quite brown enough, pop them back in for 30 seconds max on broil (watch like a hawk). Burnt cheese slices are a crime.
Storing and reheating this recipe
Refrigerator Storage
Store your baked cheese slices in an airtight container between layers of parchment paper to maintain crispness. I recommend using glass Pyrex containers with snap-on lids—they keep the cheese bites fresh for up to 2 days at 40°F or below.
The parchment prevents sticking and preserves that golden crunch. For extra insurance, place a paper towel on top to absorb any excess moisture. 🌡️
Freezer Prep
For longer storage, freeze your cheese slices on a parchment-lined baking sheet first—this prevents them from sticking together. Once frozen solid (about 1 hour), transfer them to a freezer bag with 1 inch of headspace for expansion.
They’ll keep for 2 months without losing texture. When ready to eat, thaw in the refrigerator overnight for best results. 🧊
Oven Reheating
My preferred method is reheating in a 350°F oven for 5-7 minutes until golden and bubbly. Place them on a baking sheet with 1 inch of space between slices.
A light brush of olive oil before reheating helps restore crispiness. For extra flavor, add a sprinkle of garlic powder or Italian seasoning during reheating. 🔥
Air Fryer Option
For a quicker fix, use an air fryer at 350°F for 3-4 minutes, shaking the basket halfway through. This method works best for single-serving reheats and gives that satisfying crunch without overcooking. Just be careful—they heat up fast! I use a Ninja Foodi for perfect results every time. ✨
Microwave Caution
Microwaving is possible but less ideal—it can make the coating soggy. If you must, use 50% power for 15-20 seconds, then check. Add a damp paper towel to the plate to help retain crispness.
For best texture, always follow up with 30 seconds in the oven to restore crunch. 💡
Serving Warm
These cheese slices are best served warm—right out of the oven or reheated. The contrast of crispy exterior and melty center is what makes them irresistible. Pair with marinara sauce, ranch dressing, or honey mustard for dipping.
I love serving them at parties with a cool beer—the crunch cuts through the richness perfectly. 🍺
Nutrition facts
Frequently asked questions
Can I use pre-shredded cheese for this recipe?
Pre-shredded cheese works in a pinch, but it contains anti-caking agents that can make the cheese slices less melty. For the best texture, use freshly sliced mozzarella (about ¼-inch thick) and freshly shredded cheddar. If you must use pre-shredded, pat it dry with a paper towel first to remove excess moisture.
Why did my cheese slices turn out greasy instead of crispy?
Greasy slices usually mean the cheese melted too much before baking or the coating wasn't fully adhered. Keep your cheese cold until baking, and ensure the egg wash is lightly beaten (not frothy). Press the panko coating firmly to create a thin, even layer. Bake at 375°F for 12-15 minutes—any longer risks overcooking.
What’s the best cheese blend for extra flavor?
For deeper flavor, try blending mozzarella with smoked gouda (for a smoky kick) or fontina (for nutty sweetness). Add ½ tsp smoked paprika or 1 tsp dried parsley to the breadcrumb mix. Pro tip: A splash of heavy cream (1 tsp) mixed into the cheese before shaping keeps it extra creamy.
Can I make these cheese slices ahead of time?
Yes! Assemble the coated slices, then refrigerate them on a parchment-lined tray for up to 24 hours before baking. For longer prep, freeze the assembled slices (unbaked) on a tray for 1 hour, then transfer to a bag. Bake straight from frozen at 375°F for 15-18 minutes, adding 1-2 minutes if needed.
How do I keep the cheese from leaking out when baking?
Shape the cheese slices slightly thicker in the center (½-inch) and thinner at the edges to contain the melt. Chill the shaped slices for 10 minutes before coating to firm them up. Avoid overfilling—stick to 1 tsp cheese per slice. Bake at 375°F and remove when edges are golden but centers are still slightly soft (they’ll firm as they cool).